RGB vs CMYK: Understanding Color Models for Print and Digital Success?

Ever experienced that sinking feeling when your vibrant on-screen design prints out looking dull and lifeless? It’s a common, costly issue stemming from misunderstanding color models.

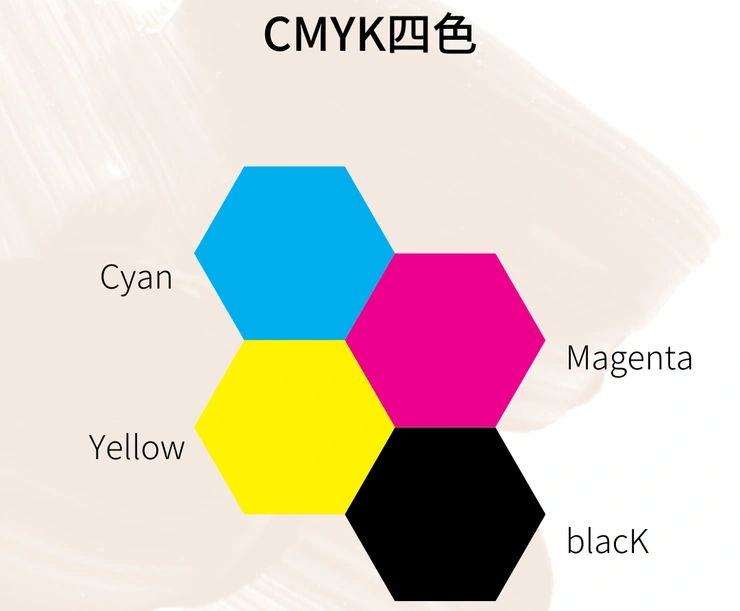
RGB (Red, Green, Blue) uses light for digital screens, offering bright colors. CMYK (Cyan, Magenta, Yellow, Key/Black) uses ink for printing, resulting in a more limited color range. Use RGB for digital displays and CMYK for print projects.

Getting this right is fundamental for anyone creating visuals for both the web and print. I’ve spent decades in this field, and I’ve seen the RGB vs. CMYK confusion cause more headaches than almost anything else. Let’s clear it up so your colors look great everywhere.

What is the difference between RGB and CMYK color models?

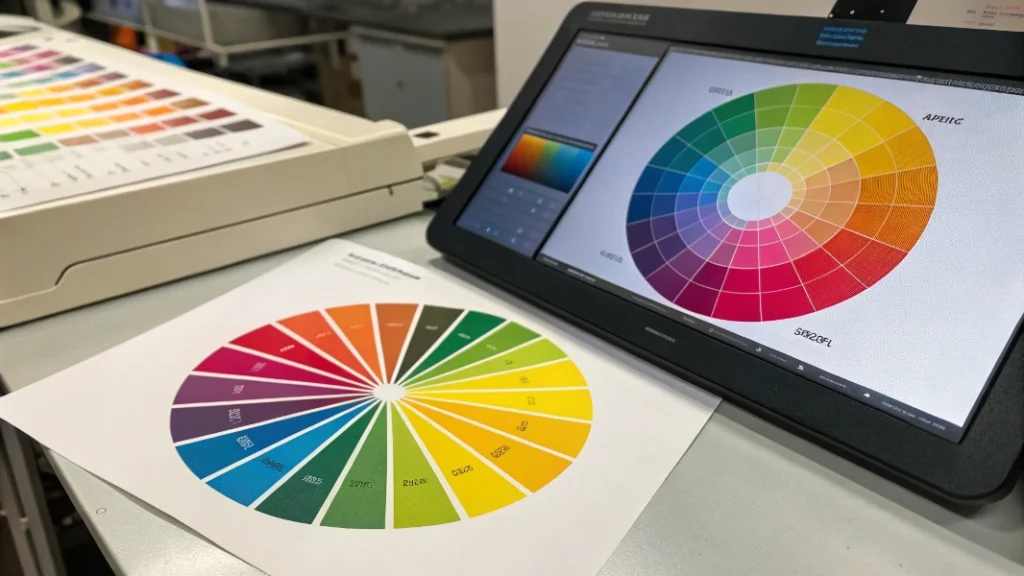
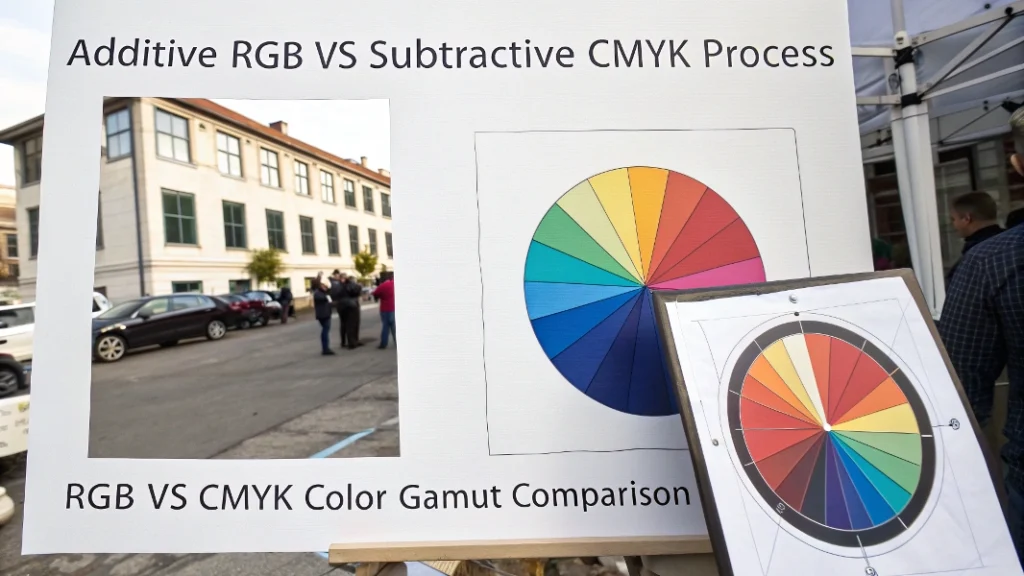
The essential difference comes down to light versus ink. RGB (Red, Green, Blue) is an additive color model. Think about things that emit light: your computer monitor, phone screen, television, or digital camera. These devices start with darkness (black) and add red, green, and blue light in various combinations and intensities to create all the colors you see. Mix all three at full power, and you get white light. Because it’s generating color directly with light, RGB can produce incredibly bright, vibrant hues – almost glowing colors – that are impossible to replicate perfectly with ink on paper. This ability to show more colors is called having a wider “gamut.”

CMYK (Cyan, Magenta, Yellow, Key/Black), on the other hand, is a subtractive color model. This is for things that reflect light, primarily anything printed on a physical surface like paper. Here, you start with a white surface (paper reflecting all light). The inks (Cyan, Magenta, Yellow) act like filters, absorbing (subtracting) specific colors from the white light. Cyan absorbs red, Magenta absorbs green, and Yellow absorbs blue. The color you perceive is the light that isn’t absorbed and bounces back to your eye. While mixing C, M, and Y inks should theoretically make black, in reality, it creates a muddy brown. That’s why we add K (Key, for Black) ink for true, deep blacks and better contrast. Critically, the range of colors CMYK can produce (its gamut) is significantly smaller than RGB’s, especially in the bright, saturated areas.

FeatureRGB (Red, Green, Blue)CMYK (Cyan, Magenta, Yellow, Key/Black)
BasisEmitted LightReflected Light / Ink Absorption
Model TypeAdditiveSubtractive
How it WorksStarts black, adds R+G+B lightStarts white, subtracts light with C+M+Y+K ink
Used ForDigital Displays (Screens, Cameras)Printing (Brochures, Packaging, Paper)
Gamut SizeWider (More vibrant colors)Narrower (Fewer bright colors possible)

Which color mode is better for printing: RGB or CMYK?

For almost all traditional commercial printing (like offset lithography used for brochures, business cards, packaging), CMYK is undeniably the better and standard color mode to use. The reason is straightforward: printing presses physically use Cyan, Magenta, Yellow, and Black inks. They operate based on the subtractive color principle.

When you design your print project using the CMYK color mode from the beginning, you are working within the actual limitations and capabilities of the printing process. You have more control and a more realistic preview of how colors will appear when produced with ink on paper. If you supply an RGB file to a commercial printer, their system will have to convert it to CMYK anyway. This automatic conversion might not interpret your intended colors accurately, especially the very bright ones that fall outside the CMYK gamut. Designing in CMYK allows you, the creator, to manage these color shifts proactively. You can make adjustments to get the best possible result within the printable range, significantly reducing the chance of unpleasant surprises when the final product arrives. In my experience, starting and finalizing print designs in CMYK is a fundamental step for professional, predictable results.

Why does CMYK look duller than RGB?

CMYK looks duller than RGB primarily because of the difference between emitted light and reflected ink, and the resulting smaller color gamut. Your RGB screen creates color by actively emitting light. It can generate pure, intense points of red, green, and blue light, leading to very bright, luminous, and highly saturated colors right up to pure white light.

Ink on paper, used in CMYK printing, works subtractively. It doesn’t create light; it filters the ambient light that falls on the paper. Pigments in the ink absorb certain wavelengths of light, and you see the wavelengths that are reflected back. Physical inks simply cannot replicate the intensity and purity of direct light emission. They always absorb some light, making the reflected color inherently less bright than the direct light from a screen. Furthermore, the CMYK color gamut – the total range of colors that can be reproduced with those four inks – is significantly smaller than the RGB gamut. Many of the brightest, most saturated colors you can create in RGB (like electric blues, neon greens, vibrant oranges) simply do not exist within the achievable CMYK range. When converting from RGB to CMYK, these “out-of-gamut” colors get mapped to the closest available CMYK color, which is inevitably duller and less saturated. It’s a physical limitation of the medium.

FactorRGB (Screen)CMYK (Print)Result
Color CreationEmits LightAbsorbs/Reflects Light (Ink)RGB appears brighter, more luminous
Gamut SizeWiderNarrowerRGB can display more vibrant colors
Out-of-Gamut ColorsDisplays bright/saturated colorsCannot reproduce many bright RGB colorsConversion leads to duller colors
MediumLight sourceInk on paperPaper/ink reflects less intensely

Should you convert RGB to CMYK before printing?

Yes, absolutely. For professional printing workflows, especially offset printing, you should always convert your RGB files (like photos) or designs to the target CMYK color space before sending them to your print provider.

Taking control of this conversion step yourself is crucial for several reasons. Firstly, it gives you predictability and control. By converting using professional software, you can preview the inevitable color shifts that happen when moving from the larger RGB gamut to the smaller CMYK one. This allows you to make conscious adjustments – perhaps tweaking a specific color, adjusting saturation, or choosing a different shade – to achieve the best possible representation of your vision within the limits of print. Secondly, conversion tools offer different strategies (rendering intents) for handling those out-of-gamut colors, and you can choose the one that works best for your specific image or design. Thirdly, you ensure that blacks are handled correctly, differentiating between black text (usually 100% K) and rich blacks for large areas. Lastly, having the file in the final CMYK color space allows for more accurate proofing, both on-screen (soft proofing) and with physical printed proofs. Leaving the conversion entirely up to the printer’s automated systems means relinquishing control and risking unexpected, potentially poor results.

How to accurately convert RGB to CMYK

Achieving an accurate RGB to CMYK conversion relies on using professional design software equipped with a robust color management system and, most importantly, the correct ICC profile for the specific printing condition.

Here’s the process:

  1. Use Professional Software: Adobe Photoshop, Illustrator, or InDesign are the industry standards, featuring the Adobe Color Engine (ACE).
  2. Calibrate Your Monitor: While your monitor still shows RGB, calibration provides a more consistent and reliable view for making judgments.
  3. Get the Right ICC Profile: This is the critical piece. An ICC profile describes the color characteristics of a specific device or print condition (press + paper type). Ask your print provider for the exact CMYK profile they recommend for your job (e.g., ‘U.S. Web Coated SWOP v2’, ‘Coated FOGRA39’). Using a generic profile is better than nothing, but a specific one is best.
  4. Perform the Conversion:
    • In Photoshop: Go to Edit > Convert to Profile. Set the Destination Space to the target CMYK profile your printer provided. Choose a Conversion Option (Rendering Intent – often ‘Perceptual’ for photos, ‘Relative Colorimetric’ for vector art; ask your printer if unsure). Ensure ‘Use Black Point Compensation’ is checked.
    • In Illustrator/InDesign: Ensure the document’s intent is Print (File > Document Setup) and color mode is CMYK (File > Document Color Mode). Manage placed image conversions via Color Settings (Edit > Color Settings) and the Convert to Profile command, always referencing the target CMYK profile.
  5. Review and Soft Proof: Use the software’s soft proofing capabilities (View > Proof Setup / Proof Colors) using the target CMYK profile to simulate the print output on your screen and check for unwanted color shifts.

Accuracy comes from telling the software exactly how to translate RGB values into the specific limitations and characteristics of the target CMYK printing process, which is what the ICC profile does.

How to convert CMYK back to RGB without color loss

Converting from CMYK back to RGB is generally much less likely to cause significant color loss or visual distortion compared to the RGB-to-CMYK direction. This is because the RGB color gamut is larger than the CMYK gamut. Most colors that can be printed using CMYK inks can be accurately represented using RGB light on a screen.

When you convert a CMYK file (perhaps a print logo you now need for a website) to RGB, the software translates the ink values into corresponding light values. Since RGB has a wider range, it can typically accommodate the CMYK colors without issue. You won’t usually see the dramatic dulling or hue shifts that occur when trying to squeeze bright RGB colors into the smaller CMYK space.

The process involves using color management, similar to the reverse:

  1. Use professional software.
  2. Identify the Source CMYK Profile: The CMYK file should ideally have its original profile embedded or assigned (e.g., ‘Coated FOGRA39’). This defines what the CMYK numbers mean.
  3. Choose a Target RGB Profile: Select the appropriate RGB profile for the intended use. sRGB (specifically sRGB IEC61966-2.1) is the standard for web browsers and most screen displays. Adobe RGB (1998) is wider but less compatible online.
  4. Use Conversion Tools: In Photoshop, Edit > Convert to Profile. Select the target RGB profile (like sRGB).

While minor mathematical rounding might occur, visually, converting from a standard CMYK print file to a standard RGB profile like sRGB typically preserves the appearance of the colors very well. The “loss” problem is primarily when going from the larger RGB space to the smaller CMYK space.

Manual vs. software-based RGB to CMYK conversion

There’s really no contest here: Software-based conversion using color management is the only reliable and accurate method. Manual conversion is impractical and inaccurate.

Manually converting RGB to CMYK would involve trying to guess the correct percentages of Cyan, Magenta, Yellow, and Black ink needed to replicate each specific RGB color, pixel by pixel. This is impossible to do accurately for several reasons. Color conversion isn’t a simple, fixed mathematical formula; it’s a complex mapping that depends on the specific start and end points (the RGB values and the target CMYK print conditions defined by an ICC profile). How would you manually determine the “closest” printable CMYK blue for a specific vibrant RGB blue, considering the specific press, ink, and paper? How would you handle colors outside the CMYK gamut consistently?

Professional software (like Adobe Photoshop, Illustrator, InDesign) uses sophisticated color management engines and ICC profiles to perform these complex calculations automatically and consistently across millions of pixels. These tools are built on scientific measurements of color reproduction.

Manual adjustment does have a place, but only after the initial software-based conversion. Once the file is in CMYK, you might manually tweak specific CMYK values (e.g., slightly increase Magenta in a red to make it warmer) to fine-tune the appearance based on proofs. But the bulk conversion from RGB to CMYK absolutely requires software using proper color management. Trying to do it manually from scratch is not a viable workflow for professional results.

MethodProsConsRecommendation
Software (Managed)Accurate, Consistent, PredictableRequires software, understanding profilesStandard Practice
Manual ConversionNone for bulk conversionInaccurate, Inconsistent, Impractical, Time-consuming, UnreliableAvoid
Manual AdjustmentUseful for fine-tuning after conversionRequires careful proofing, only for specific color adjustmentsFor targeted edits

Do printers automatically convert RGB to CMYK?

Yes, many modern printing systems, particularly digital printers and the prepress software (RIPs) used for offset printing, are capable of automatically converting RGB files to CMYK if they receive them. They have default settings and profiles to handle files that aren’t already in the expected CMYK format.

However, relying on this automatic conversion is generally not advisable for professional quality control. When you let the printer handle the conversion automatically, you give up control. You don’t know exactly which CMYK profile they are using as the target, how their system decides to handle colors that are outside the CMYK gamut (the rendering intent), or how it generates black values. Their default settings might not be the best choice for your specific design, potentially leading to unexpected color shifts, dullness, or inconsistent results, especially if you print the same job at different times or with different providers.

Think of it this way: converting the file to CMYK yourself before sending it is like giving the printer a precise blueprint. Sending an RGB file and letting the printer convert it is like giving them raw materials and hoping they build it correctly based on their standard interpretation. For predictable, high-quality results where color accuracy matters, taking control of the conversion yourself using the correct profile provided by your printer is always the better approach. Automatic conversion is okay for casual, non-critical prints, but not ideal for professional work.

How to preserve colors when converting in InDesign

While you can’t magically force CMYK to reproduce colors outside its gamut, you can use InDesign’s tools to manage the RGB to CMYK conversion process intelligently and preserve the intended appearance as faithfully as possible. The goal is controlled, predictable conversion, not zero change.

Here’s how:

  1. Establish Correct Color Settings: Go to Edit > Color Settings. Ensure your CMYK Working Space is set to the specific ICC profile recommended by your print provider for the job’s paper and press type. This is crucial. Set Color Management Policies to Preserve Embedded Profiles and enable the Ask When Opening/Pasting options for awareness.
  2. Convert Images Before Placing (Recommended): For critical raster images (like photos), the best practice is often to convert them from RGB to the target CMYK profile in Photoshop first. This offers the most control over the conversion rendering intent and allows pixel-level adjustments before placing the image into InDesign.
  3. Use Soft Proofing: Activate soft proofing (View > Proof Setup > Custom) using the target CMYK profile. Enable Simulate Paper Color and Simulate Black Ink for the most realistic preview of how colors might dull or shift on the chosen paper stock. Toggle View > Proof Colors (Cmd/Ctrl+Y) to compare the proof preview with your working view. This helps identify problem colors before finalizing.
  4. Make Necessary Adjustments: If the soft proof shows unacceptable color shifts (e.g., a brand blue turning purple), manually adjust the CMYK values of that specific object using the Color panel (Window > Color). Nudge the sliders to find the best possible representation within the CMYK gamut that aligns with your intent.
  5. Control PDF Export Settings: When exporting your final print-ready PDF (File > Export), choose a suitable standard (like PDF/X-1a or PDF/X-4, or follow printer specs). In the Output tab, pay close attention to Color Conversion and Destination settings. Often, if you’ve managed colors correctly, Convert to Destination (Preserve Numbers) using the correct CMYK profile is appropriate, but always confirm with your printer.

By using the correct profiles, leveraging soft proofing to anticipate shifts, and making informed adjustments, you guide the conversion process rather than leaving it to chance, thus “preserving” your intended colors as much as the physics of CMYK allow.

Tips for achieving vibrant blues in CMYK

Achieving a truly “vibrant” blue in CMYK that matches the intensity of many RGB screen blues is a common challenge, as those super-bright blues often fall outside the standard CMYK gamut. However, you can create the most impactful and “cleanest” blues possible within CMYK’s constraints.

  1. Maximize Cyan: Cyan is your primary blue ink. For a strong blue, you’ll typically use a high percentage, often 100%.
  2. Control Magenta Carefully: Magenta adds depth and shifts blue towards purple. For a relatively clean, bright blue, keep Magenta moderate. Values between 30% to 70% are common. Too much Magenta (e.g., 80%+) will make it look decidedly violet. Less Magenta (e.g., 20-40%) can yield a “sky blue” but may lack punch.
  3. Minimize or Eliminate Yellow: Yellow is the complementary color to blue and will neutralize it, making it appear dull, muddy, or greenish. For most vibrant blues, keep Yellow at 0% or very low single-digit percentages.
  4. Avoid Black (K) for Brightness: Black ink will darken and dull the blue. Only use it if you specifically need a darker, more muted shade. For the brightest possible CMYK blues, K should be 0%.
  5. Consider the Paper Stock: Colors, including blues, will generally appear brighter and more vibrant on coated white paper compared to uncoated or off-white paper.
  6. Proof Religiously: Always get a printed proof from your print provider, especially for critical brand colors. This is the only way to see the true result.
  7. Consider Spot Colors (Pantone): If a very specific, vibrant blue is absolutely critical and CMYK can’t deliver, using a Pantone (PMS) spot color is the best solution. This is a pre-mixed ink printed as a separate color, ensuring consistency and often achieving brighter hues than CMYK mixes, but it adds cost.

Here are some example CMYK mixes for blues, keeping in mind results vary by press and paper:

CMYK Blue TypeCyan (C)Magenta (M)Yellow (Y)Black (K)General Look
Strong Royal Blue100%70%0%0%A common, fairly strong and bright CMYK blue.
Cleaner Bright Blue100%50%0%0%Less purple, leans more towards pure cyan.
Deep Blue100%80%0%10-20%Darker, richer, using some black for depth.
Sky Blue60-70%15-25%0%0%Lighter, less saturated, more airy.

Experiment with these and always discuss with your printer.

Conclusion

Understanding RGB for screens and CMYK for print is vital. Using the correct color model for your project’s destination ensures your colors look as intended, saving time and money.


Ask For A Quick Quote

Get a custom quote from our product specialists! Fill out our quote request form, or email us directly at quote@lucklinpak.com.